
If you've read earlier posts on this blog (such as here and here) then you are probably aware of my opinion regarding the very concept of committing an electronic logbook to ink-and-paper. Add to that the fact that there are superior alternative methods (such as a live link to one's logbook, or even a simple PDF) for sharing your logbook with a regulator, insurer, or interviewer, and I palm my forehead that anybody bothers.
But alas, I'm not everybody. And I can't expect everybody to share my perspectives, especially when the aforementioned regulators, insurers, or interviewers often also do not share my perspectives.
For that reason, I've made sure that MyFlightbook's support for printing is as rich, customizable, and full-featured as I can, including (currently) 14 different layouts, and a host of customization options.
So that gives you the tools to print out your logbook. But it begs the more subjective question: how do you make it look really good and really professional?
One user on the site named Malcolm who has invested a lot of time on this has shared with me what he learned, and I thought I'd share it here so that everyone can benefit. (Thanks, Malcolm!)
Obviously, everyone's flying experience is unique, so the choices he made below are specific to his logbook, but hopefully his example will point people in the correct direction.
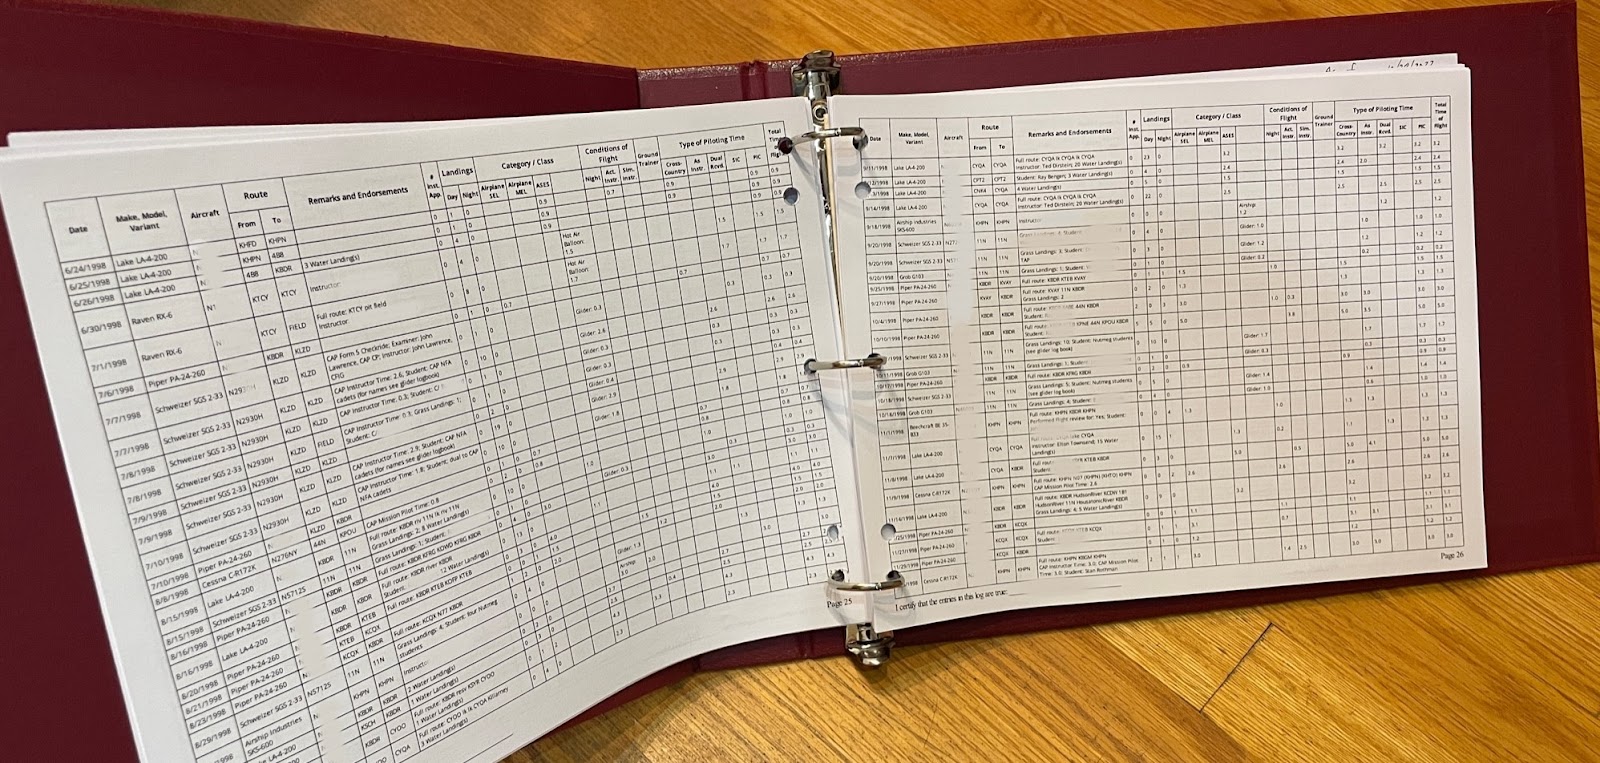
Allow me to start with a view of his finished product so that you can see what is possible:
Task 1: Select a layout

Task 2: Get rid of the cruft
There is a ton of data that you might log on a flight that you want to track, but which is not necessarily relevant for a job interview or ramp check. Below is a screenshot from Malcolm's logbook of data that he felt was important to track but not important to print.

Note as well that anything that you put after "///" in comments will also automatically be excluded from printing.
Some layouts support images - if you're printing as a memory book, you will almost certainly want to include these. If it's for a job interview, you almost certainly do not.
Signatures (available in all layouts) is a different story - you may want them to demonstrate compliance, or they may be noise to you if your training was long ago.
Task 3: Save it for easy future access
At the top of the print-view screen is a link icon (
Task 4: Set up your print layout
Landscape (wide) format almost always works best, since horizontal space is most critical for fitting everything.
Set both side margins at least 12mm in order
to make the blank margin wide enough that the hole punch would not obliterate
some of the data. Unfortunately, the PDF generator I am using at the moment does not support mirrored margins (where the inside margin is wider than the outside margin in order to accommodate the punch holes)
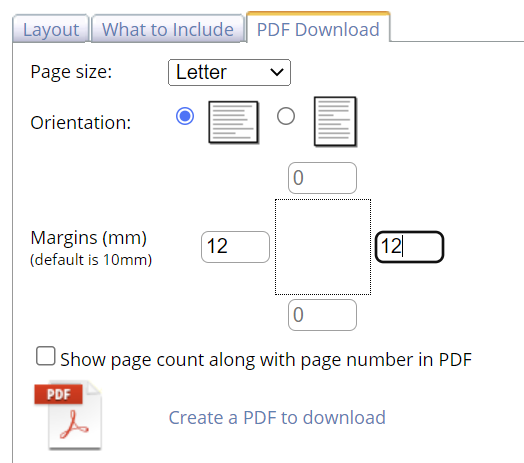
Click "Create a PDF to download". Review the results and tweak until you are satisfied.
You're now ready to print.
Task 5: Print
Task 6: Bind
Binding your logbook definitely gives it a professional look and even if it doesn't say anything about your competency as a safe pilot, it does demonstrate your attention to detail.
Malcolm found two options for the binder:
- Buy a 3-ring landscape format binder such as this one. The only one I was able to find was unnecessarily wide (1.5" capacity) but would work fine.
- Or, buy a checkbook binder. These come with 7 rings in it. Using a heavy pair of pliers, it is easy to twist out four of the 7 rings and pull them out.


Since you're printing in landscape, the location for the holes will be different than in portrait mode. As a result, punching holes will require a 3-hole punch with adjustable hole positions. These are usually available in an office, print shop, or office supply store. If you don't have this, you can take your printout to Staples or some other copy shop and pay them to punch the holes in it. (Bring the binder so they can be sure to put the holes in the right place. Show them the format of the binder and warn them not to punch the long side of the paper, since this is what they would be accustomed to doing.)
Malcolm also recommends using post-it arrows pointing to each checkride; his interviewer remarked on how much he appreciated that.
I'll add two more options to consider in this vein:
- You can use flight coloring to accomplish the same goal, if you print in color, though the post-its can still help to quickly find the page containing the relevant flights.
- Or, if you skip paper and share electronically, search functionality works pretty well to quickly find check rides (or other relevant experience), rendering this all moot
No comments:
Post a Comment